Work Orders - Running, Recording, Ending
- 1
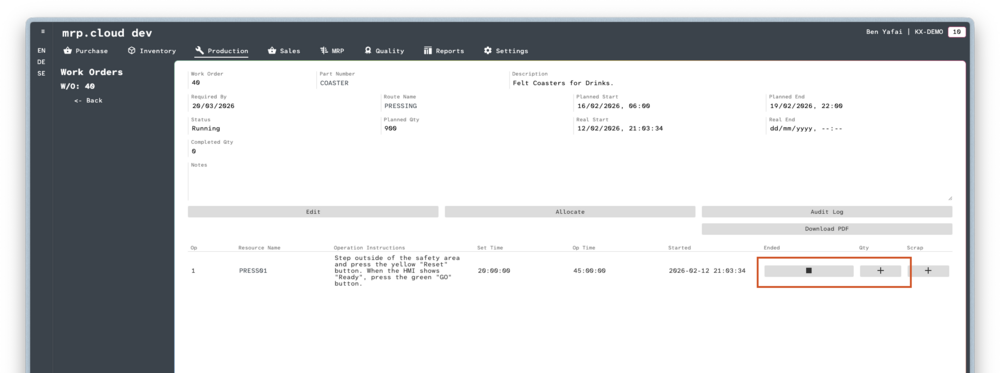
To start a Work Order, click the
▶️ Startbutton for the Job you have started.- 2
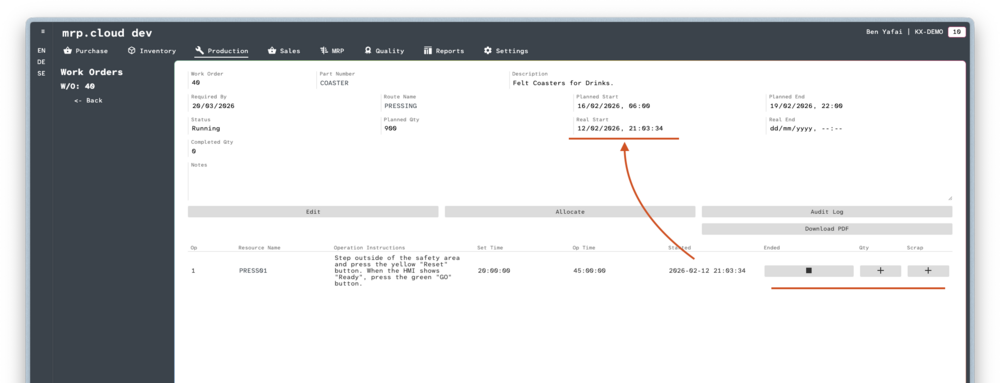
The Job will now have the Started field completed with the time you pressed
▶️ StartIf this is the first Job that has been started, the same time will now also appear in the Real Start field.
The
▶️ Startbutton has now been replaced with the⏹️ Stopand➕ Addbuttons.

- 1
Click the
➕ Addbutton below theScrapheader.- 2
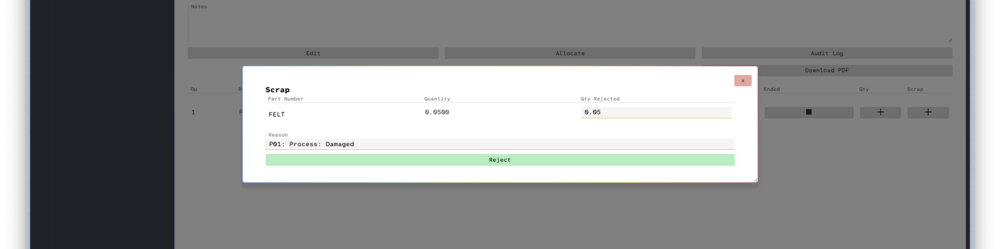
The system will list all components based on the Bill Of Materials alongside the required quantity.
Type the Quantity Rejected. This could be different per component.
Then choose the Reject Code. The codes are populated from system settings.
Then click
RejectA full list of rejects can be viewed on the Quality > Rejects page.

- 1
To record successfully completed items click the
➕ Addbutton below the Qty header.
To end the Work Order, click the⏹️ Stopbelow the Ended header- 2
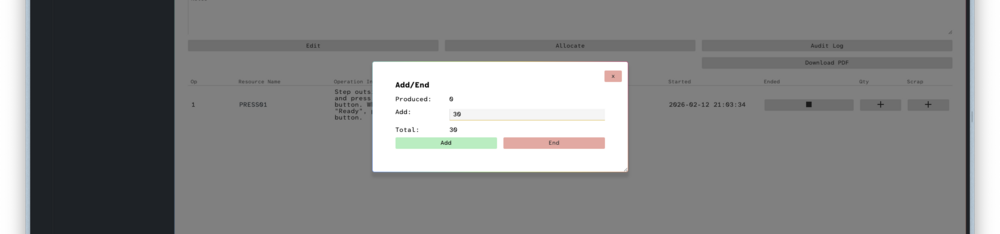
The system will display the currently recorded Produced quantity.
You can type the new quantity to Add.
The system will also show you the Total of already Produced and your Added quantity, for your reference.
You can choose from two actions;
ClickAddto record the new quantity and continue Running the Work Order.
ClickEndto record the new quantity and Stop the Work Order