Purchase Invoice - Creating
- 1
Navigate to Purchase, then Purchase Invoice page and click
Addin the top corner to begin a new purchase invoice.In the Supplier input, search for a supplier. You can type the Supplier Account Code or Supplier Name.
Results will appear below the input, you must click on the supplier to highlight and select it.Type your Supplier Invoice Number, this is typically found on the invoice that the supplier has given you. You are free to type any input here.
Enter the Invoice Date, and the Due Date for payment.
Click
Addto proceed to the main purchase invoice screen.- 2
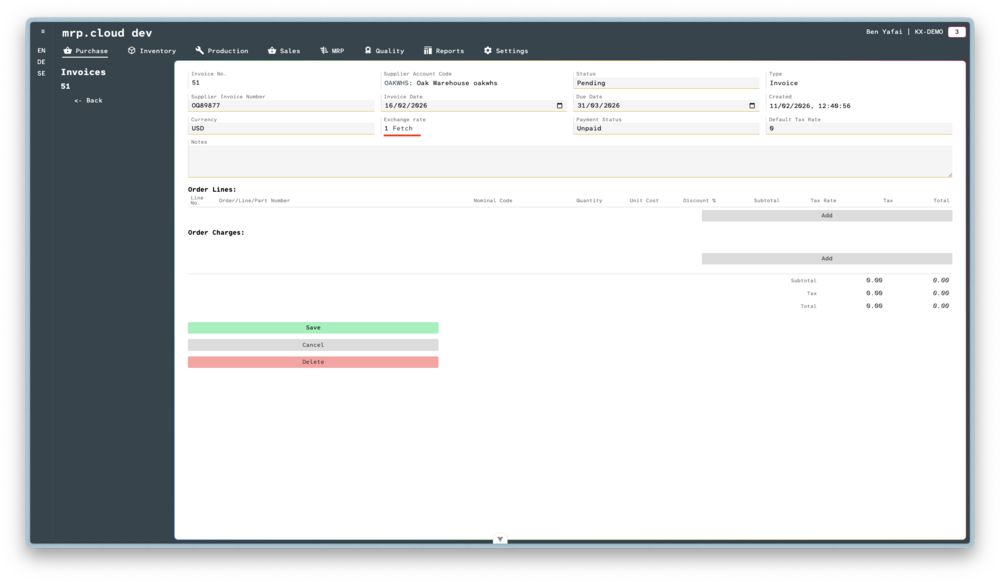
Now the core purchase invoice has been created, and a new Invoice Number has been assigned.
The Currency of this order has been pre-selected based on your Supplier's entry and can be changed if needed.
You can type any related notes to this invoice.If the Invoice is in a different currency to your home currency, you can click to Fetch the exchange rate.
This will fetch the historical exchange rate for the selected currency based upon the Invoice Date.- 3
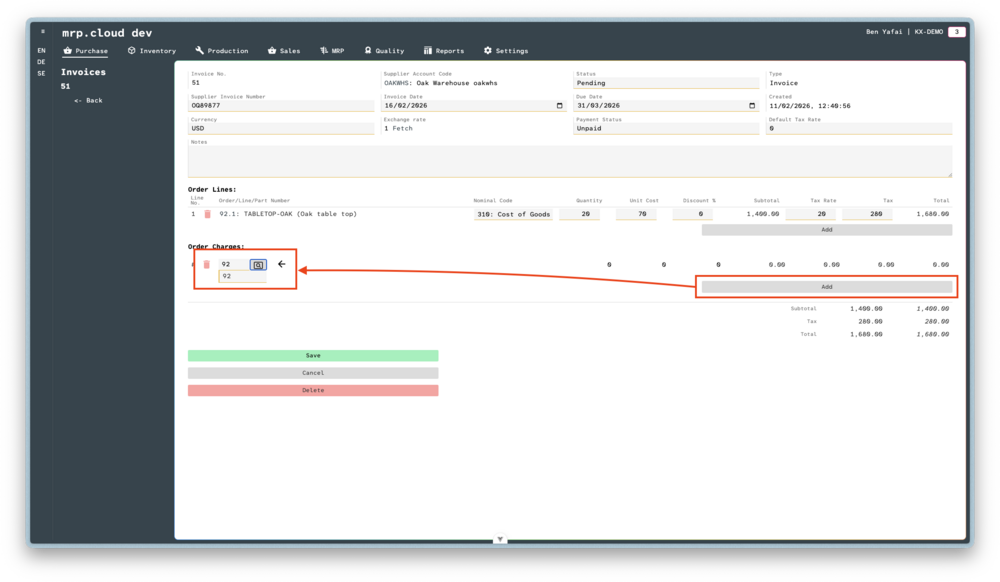
Under Order Lines, click the
Addbutton to add stock line items.It is possible to link multiple orders to a single invoice.
We first search for and select the Purchase Order Number related to this invoice.You are presented with all the item lines from this selected Purchase Order, use the checkboxes to select all lines that are related to this Purchase Invoice.
- 4
Under Order Charges, click the
Addbutton to add extra lines such as Delivery, Excise Duty, or other non-stocked items.We first search for and select the Purchase Order Number related to this invoice.
In the Part Number field you can begin to type the charge that you would like to add to the invoice. You can type the Part Number or Part Description and the system will return any matches.
Click on the item to choose it; the rest of the columns will be pre-filled based on your Charges entry and can be changed if needed.- 5
When all the items are added, you can
Savethe invoice.